Honey Milk Bread

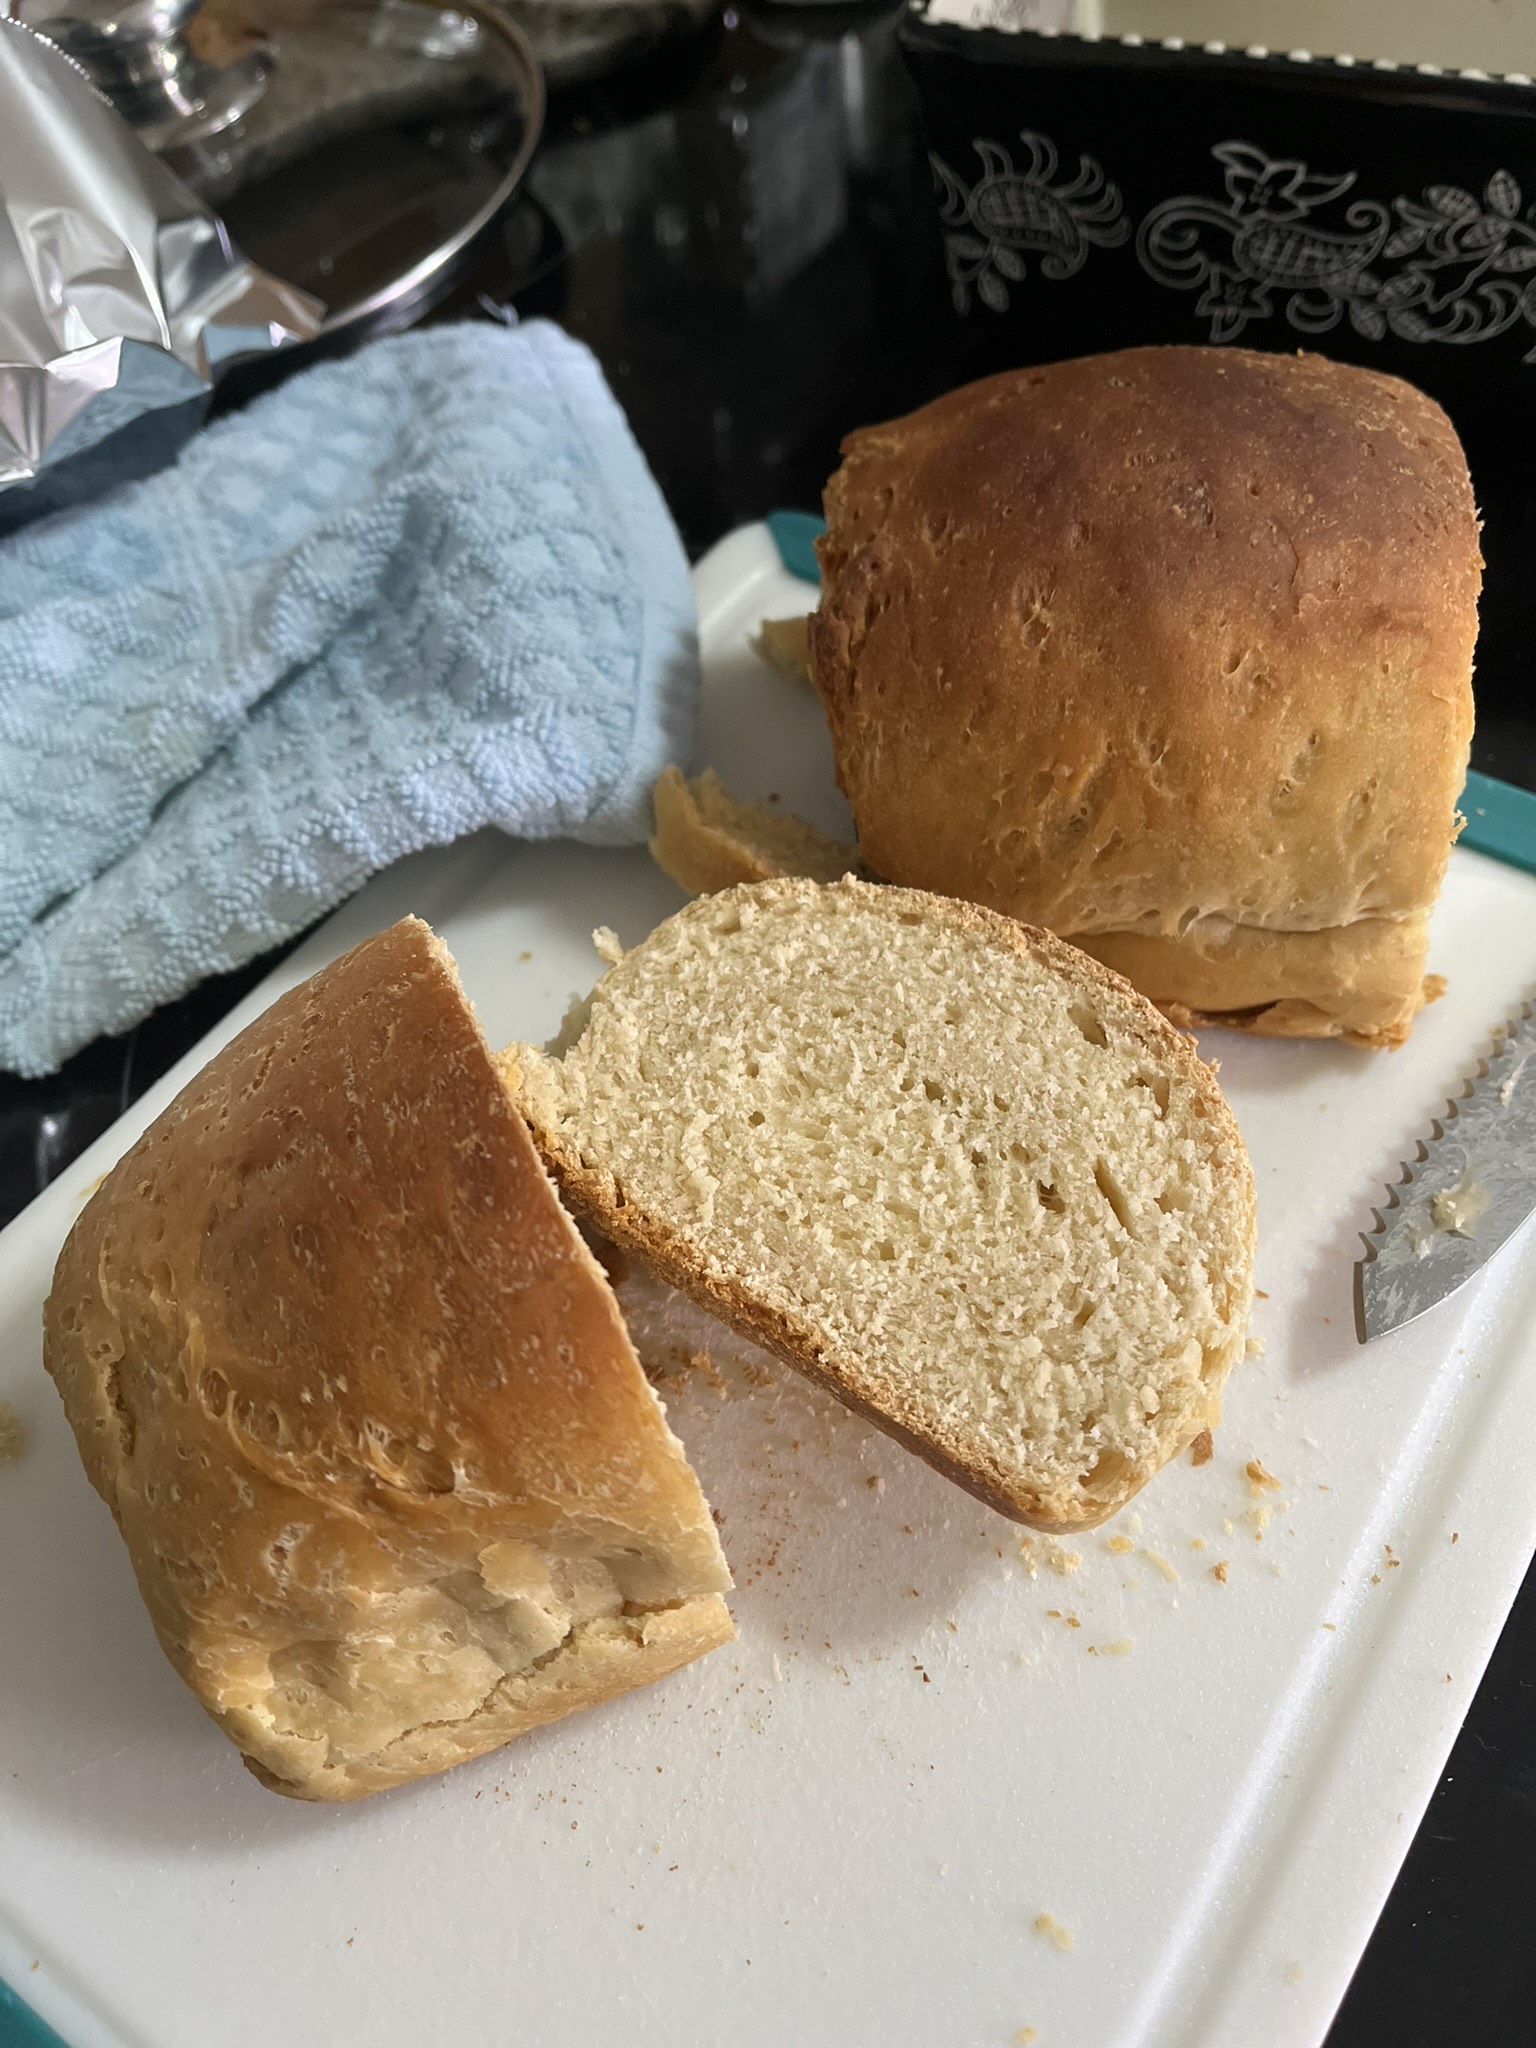
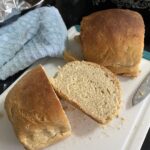
We’re deep into fall, so that means time for more baking. A hot oven to help warm the house and some fresh bread to snack on. This honey milk bread is a little denser than your traditional Japanese milk bread. Milk bread comes together quickly with simple ingredients. If you don’t have a stand mixer, you’ll work up a sweat kneading this dough, but it’s definitely worth it. Milk bread is so soft and fluffy, so easy to eat. Extracts and fillings could easily be added to change the taste, so customize as you wish!

Ingredients:

Heavy cream – this is where the fat comes from that makes the bread so yummy

Honey – this can be substituted with plain sugar and then other flavorings/extracts can be used to change up your type of milk bread

All-purpose flour – makes this recipe extra easy that you don’t need any other special types of flour

Honey Milk Bread

Print Recipe
Soft & fluffy bread perfect for snacking, sandwiches, or a side.
Course Side Dish, Snack
Keyword bread, honey, milk bread, vegetarian
Cook Time 20 minutes

Equipment

  • 1 Stand mixer highly recommended

Ingredients

  • 2/3 cup heavy cream
  • 1 cup milk
  • 1/3 cup honey + extra for brushing
  • 1 tbsp dry active yeast
  • 1 tsp salt
  • 4 cups all-purpose flour

Instructions

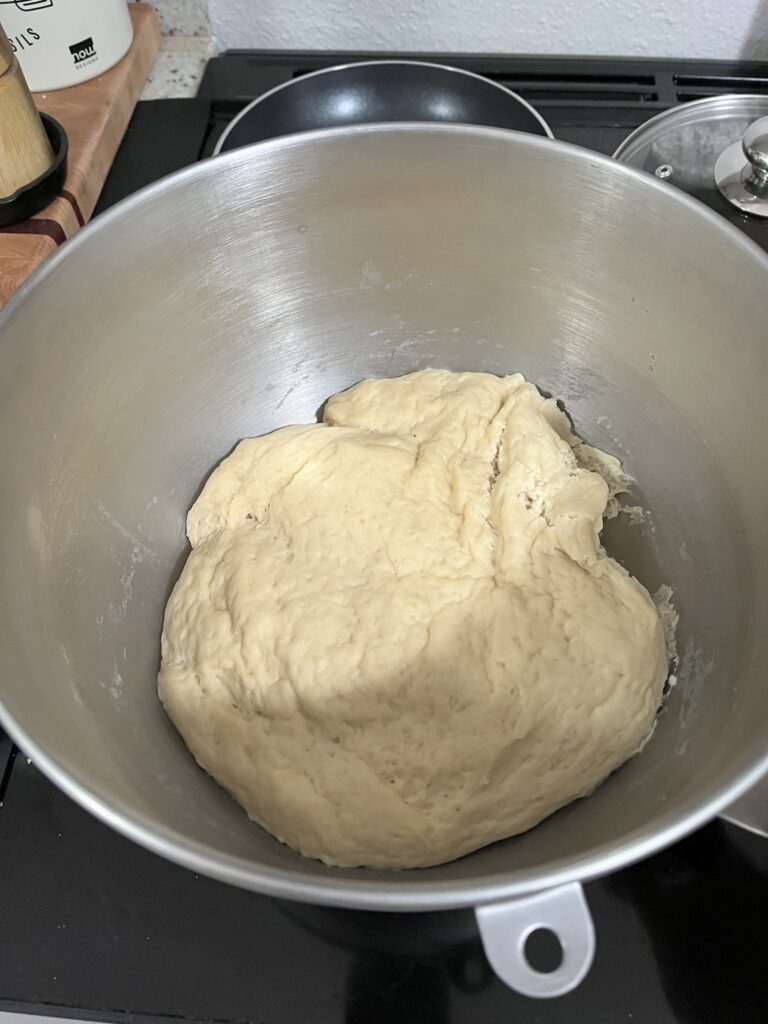
  • In the bowl of the stand mixer, mix together heavy cream, milk, honey and yeast to ensure all of the yeast is moistened.
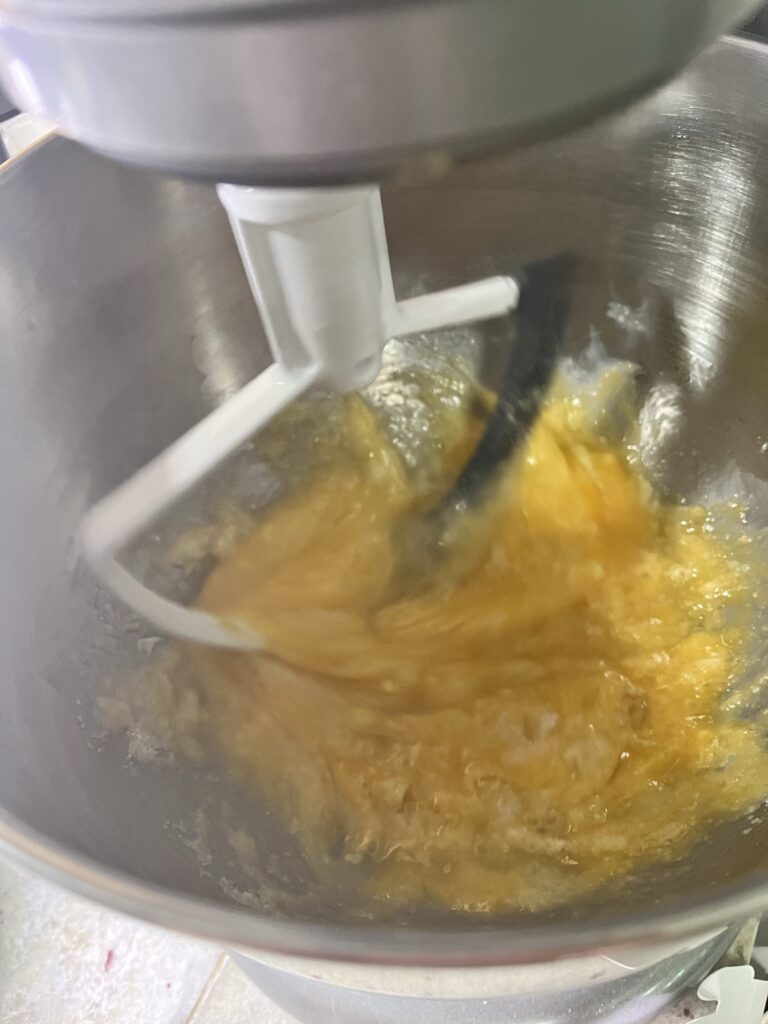
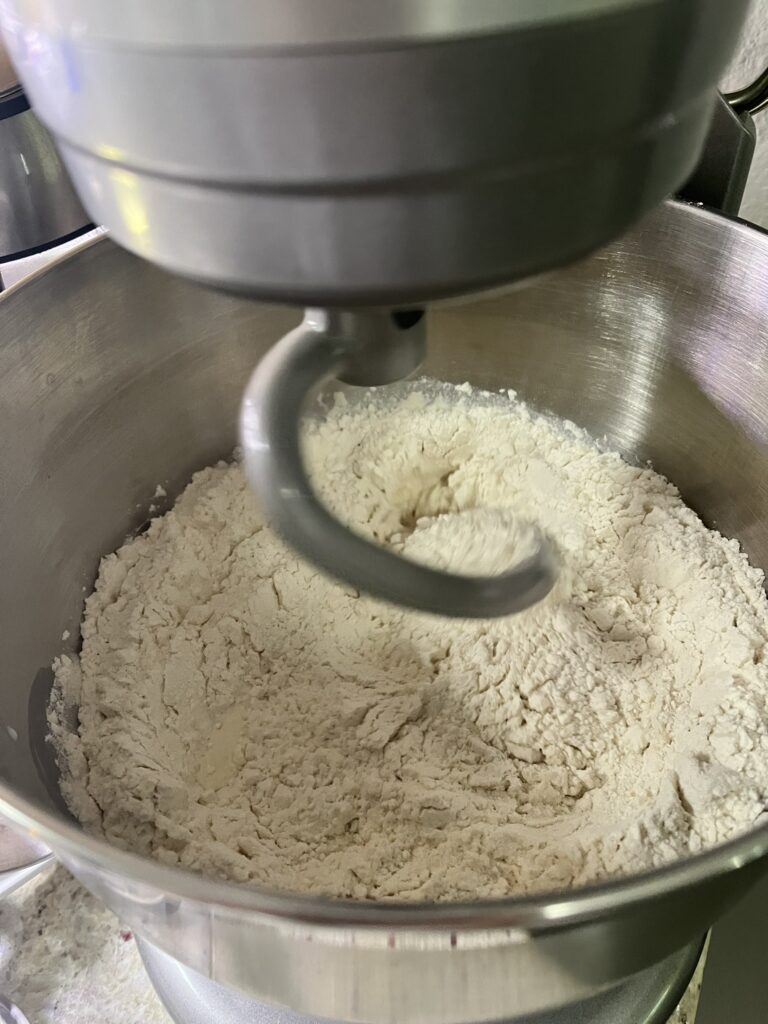
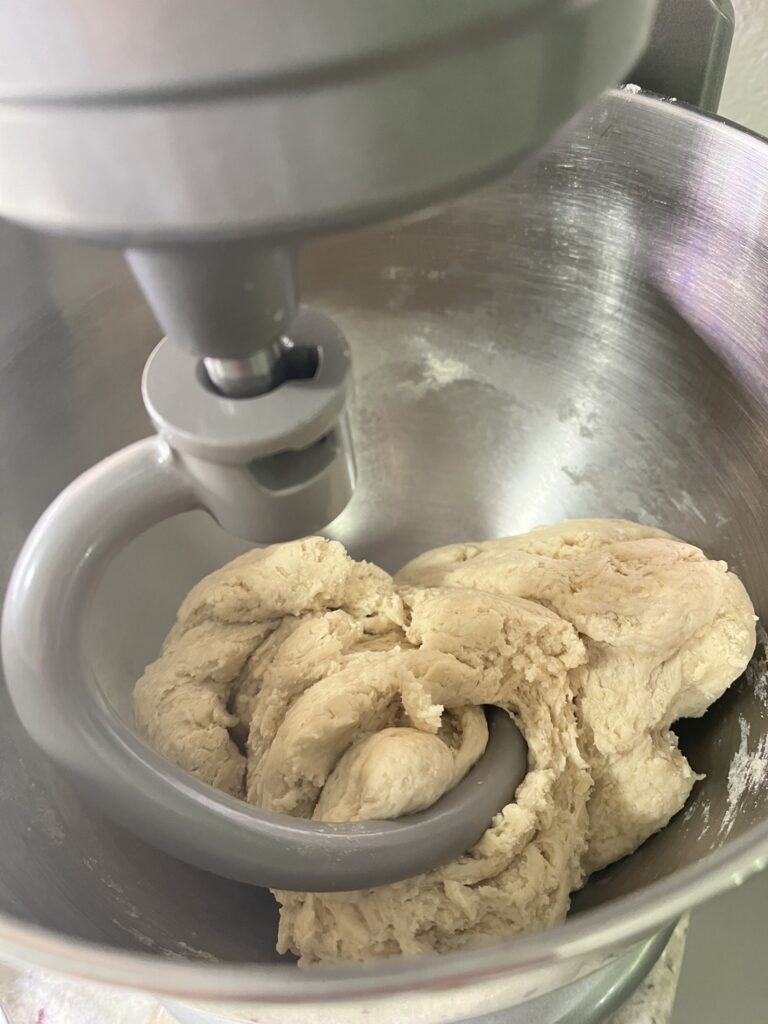
  • Add salt and flour and mix with the bread hook attachment for 10 minutes.
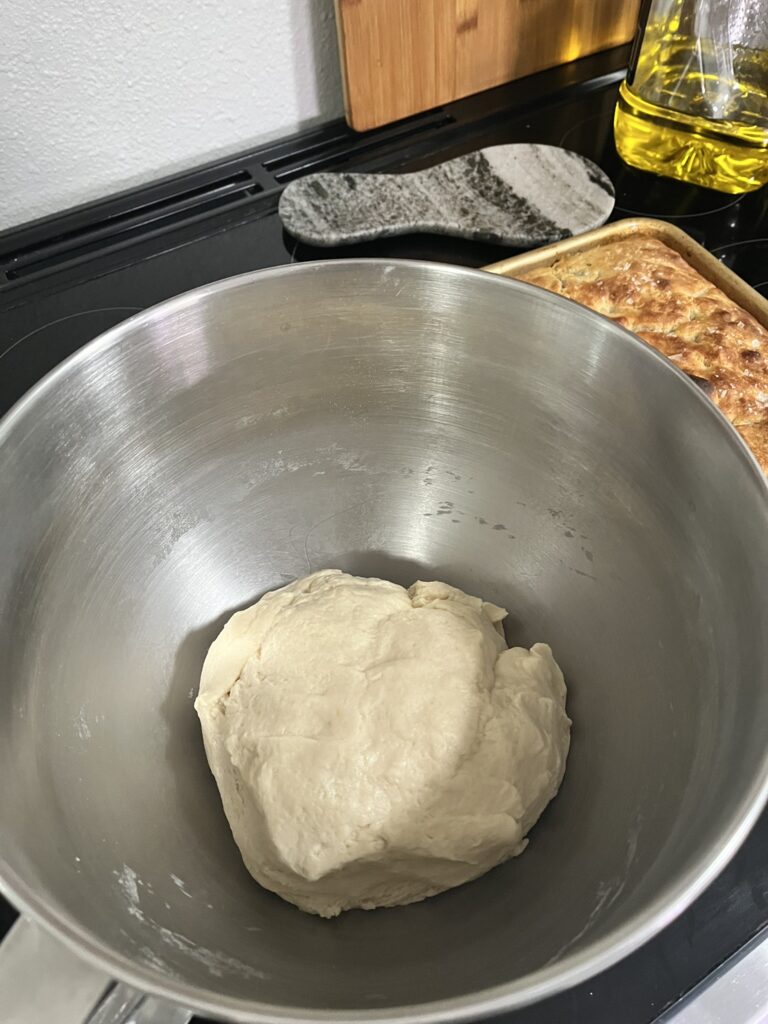
  • Cover the bowl with a towel, and allow to rise for about 2 hours, or until about doubled.
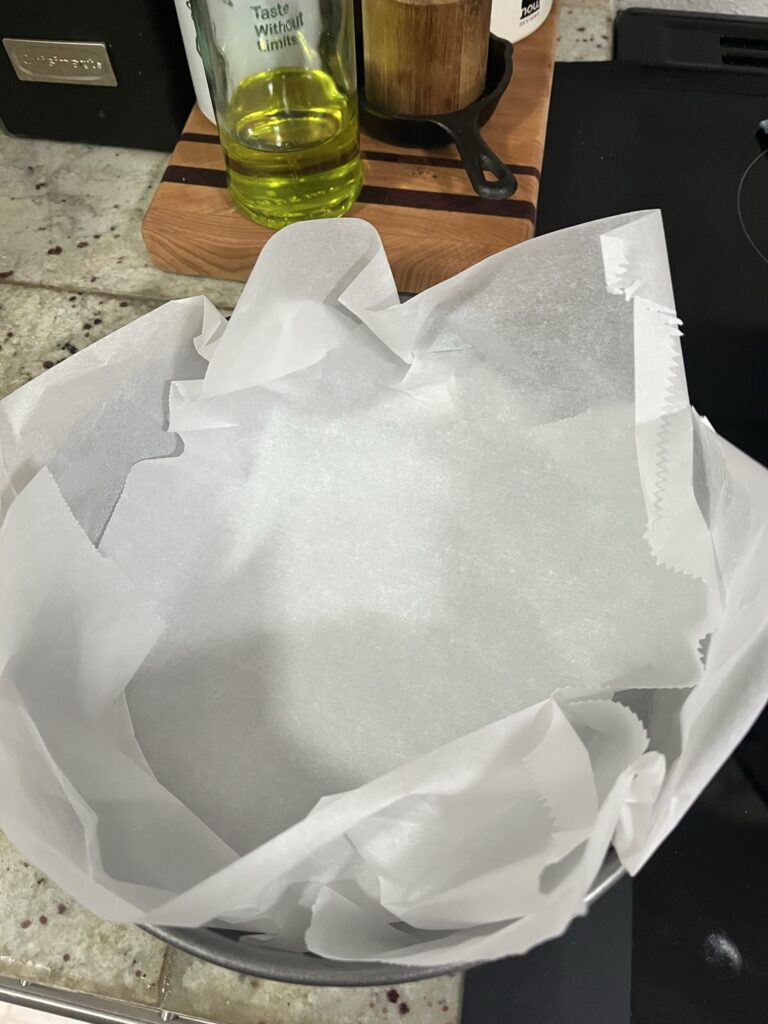
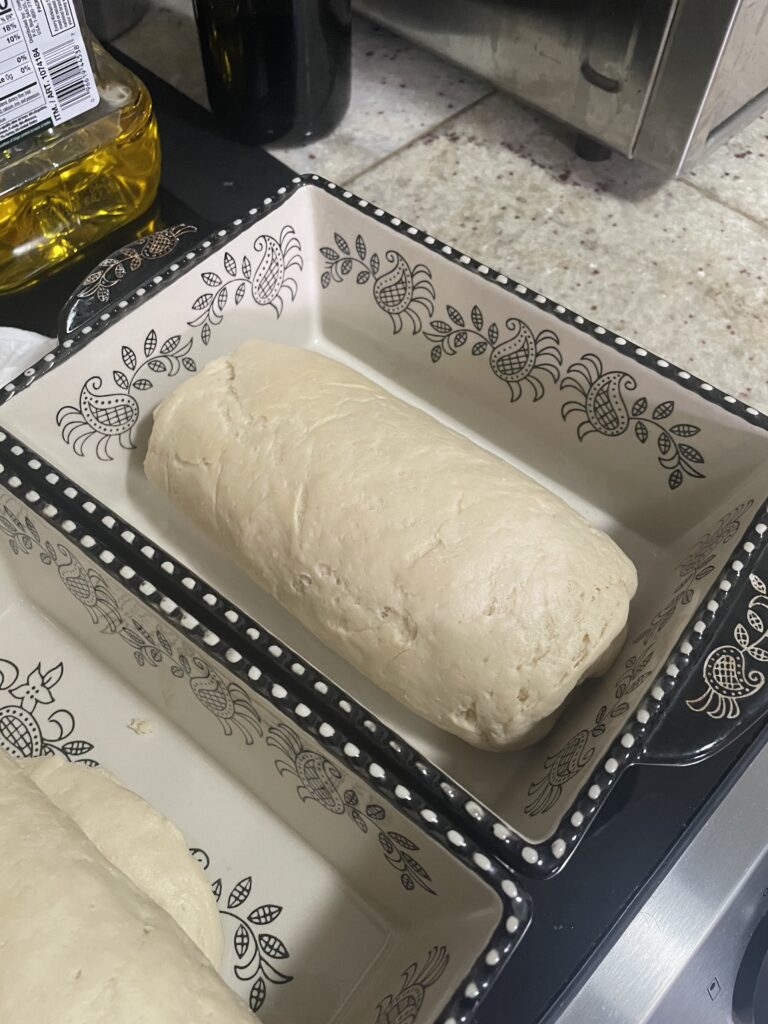
  • After, split dough into two loaf pans. If desired, you can shape the dough into smaller rolls into the loaf pan or just as an entire loaf. Don't worry about deflating the dough. If making into a loaf, I like to roll out the dough flat, and then roll into a log before placing into the loaf pan.
  • Cover loaf pans with towel and allow to rise another hour.
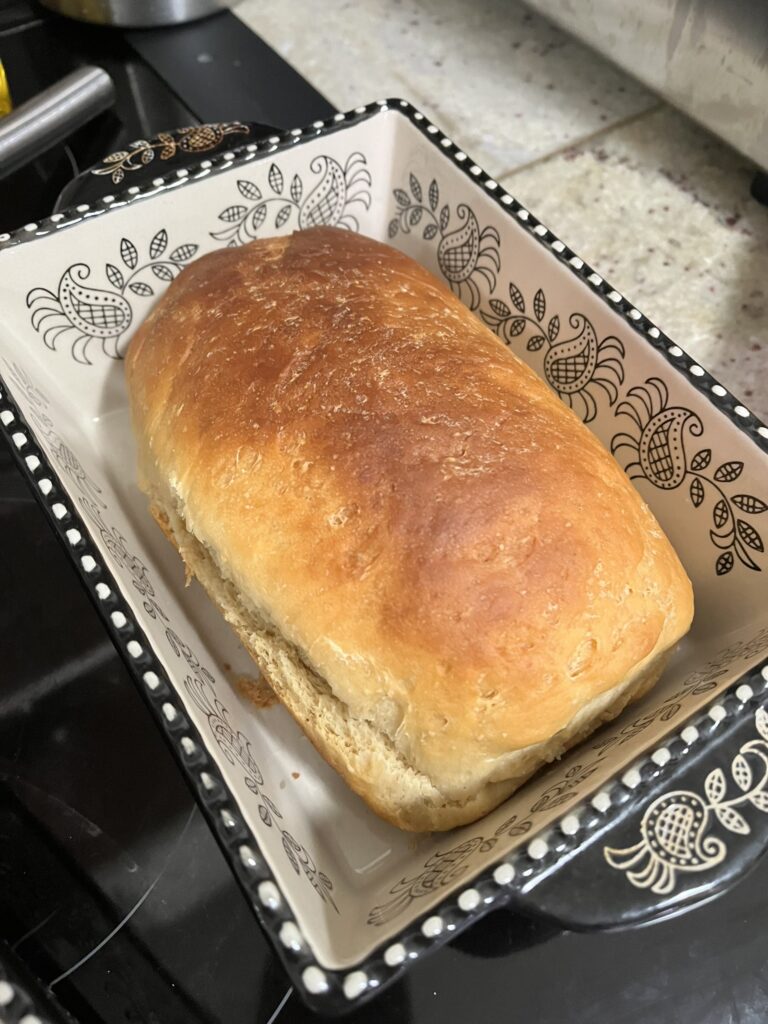
  • Bake at 350F for 20 minutes, until the top is browned. After removing from the oven, brush the tops with extra honey for a shiny top.
  • Allow to cool slightly before serving.

More bread? Try Zucchini Bread. Have leftovers? Make Bread Pudding.

Panko Crusted Tuna

I’ve been getting some notifications that one of the tuna fishing boats that I’ve purchased from previously will be back in town, selling whole tunas & filets right off of the boat, so I’ve been thinking about tuna recently. I was gifted some tuna steaks, purchased from a fishmonger off one of the island in the Puget Sound last month and it was calling to me, resulting a panko crusted tuna. The panko crust on the tuna adds some texture to the tender tuna and helps absorb the tuna if you have it with some tasty dipping sauces like a soy-teriyaki, spicy aioli, or a wasabi sauce.

Ingredients

Panko – This is the preferred breadcrumb to use as the flakes are larger than Italian-style breadcrumbs and they are lighter too! Panko is also generally unseasoned, while Italian breadcrumbs come pre-seasoned.

Tuna – You could crust some other fish varieties like cod or halibut, but you may want to cook those all the way through, as the texture may not be as tender as a seared tuna.

Panko Crusted Tuna

Print Recipe
A crispy panko exterior covers tender tuna, perfect for dipping to a soy-teriyaki, spicy aioli, or a wasabi sauce.
Course Main Course
Keyword fish, panko, tuna

Ingredients

  • 1/2 cup panko
  • 1 tbsp garlic powder
  • 1 tsp red pepper flakes
  • 1 tsp salt
  • 1 tsp pepper
  • 16 oz ahi tuna steaks cut into 2 inch thick steaks
  • vegetable oil
  • olive oil

Instructions

  • In a shallow bowl or plate, mix together panko, garlic powder, red pepper flakes, salt and pepper.
  • Pre-heat a heavy skillet or cast iron on medium high heat.
  • Coat each side of ahi tuna steaks with olive oil and pat each side into panko mixture.
  • Add 3 tbsp of vegetable oil into the skillet, allow to heat up, and then transfer tuna steaks to the pan.
  • Cook for about 1-1.5 minutes on each side, until panko is toasted to a golden brown.
  • Remove from heat, slice, and serve!

Serve with Soy Marinated Soft Eggs or The Work From Home Salad.

Lemongrass Ginger Mushrooms

Every time I go to a farmer’s market, I’m on the lookout for the mushrooms. There are so many new mushroom farms that have emerged that sell amazing varieties of mushrooms that I’ve never seen before in the grocery stores. They’re so beautiful and are always so hearty and satisfying after they’ve been cooked. I’ve been able to try new mushroom varieties like lion’s mane, queen oyster, cinnamon caps, blue oysters, lobster mushrooms, and more! A quick stir fry for these mushrooms in some lemongrass and ginger bring out their natural nutty flavor and keep them tender and textural.

Ingredients

Mushrooms – Use any variety you like! My mix ended up coming with lion’s mane, cinnamon caps, shiitake, and queen oysters.

Fish sauce – To make this completely vegan, use a vegan fish sauce or substitute with soy sauce.

Lemongrass – Mincing lemongrass by hand is an absolute pain, so use pre-minced if you can find it at your grocery store or pulverize it in a food processor. If you can’t, you can use whole lemongrass, but you’ll likely need to use 3-4 finger sizes worth of stalks that are very bruised to get the same flavor out of them

Lemongrass & Ginger Mushrooms

Print Recipe

Ingredients

  • 1 quart mushrooms
  • 1 tbsp garlic sliced
  • 1 tbsp ginger minced
  • 1 tbsp lemongrass minced
  • 1/4 cup fish sauce
  • 1 tbsp brown sugar
  • 4 Thai bird eye chilis
  • 1/2 cup fresh Thai basil

Instructions

  • In a splash of oil, sauté garlic, ginger and lemongrass until fragrant on medium high heat.
  • Add mushrooms and allow to cook undisturbed for at least 5 minutes.
  • Stir mushrooms and then add fish sauce, brown sugar, and Thai chilis.
  • Sauté for an additional 5-10 minutes until mushrooms have softened and are covered in sauce.
  • Turn off heat, allow to cool for a few minutes and then toss in fresh basil.
  • Service with rice and some chili oil!

Mushroom, Spinach, & Cheddar Frittata

What is a frittata? Really a frittata just a crust-less quiche – a big portion of fluffy, baked scrambled eggs and there’s no crust. It’s perfect for using up leftover veggies in the fridge and is great for feeding a crowd. Starting the frittata veggies in a cast iron lets you put the frittata straight into the oven and after it’s done, it can go straight to the table for serving. Serve it with some toppings like avocado, hot sauce, or salsa.

Ingredients

Heavy cream – Makes the frittata extra decadent! Feel free to substitute with alternate milks.

Meat – You could definitely add some proteins like sausage, chorizo, or bacon to this!

Vegetables – Other veggies that would be great in a frittata are onion, peppers, kale, or broccoli. You’ll just want to make sure to cook out your veggies to reduce the amount of water in the frittata so it doesn’t become bland and mushy.

Cheese – Top it with any cheese you like, or skip it all together!

Mushroom, Spinach, Cheddar Frittata

Print Recipe
Fluffy baked eggs with sautéed veggies and cheese.
Course Breakfast, Main Course
Keyword breakfast, eggs, frittata, vegetarian

Equipment

  • 1 10" oven safe pan

Ingredients

  • 1 cup mushrooms diced
  • 3 cups spinach packed
  • 1/4 cup thyme
  • 12 eggs
  • 1/2 cup heavy cream
  • 2 tsp salt
  • 2 tsp pepper
  • 1/2 cup cheddar cheese

Instructions

  • In an oven safe pan, on medium heat, sauté mushrooms in some olive oil until wilted and all liquid has been cooked out.
  • While mushrooms are cooking, mix eggs with heavy cream and salt and pepper.
  • Preheat oven to 350F
  • Add spinach to pan and stir until all spinach has wilted. While stirring, mix in a pinch of salt and pepper with the thyme to the mushrooms and spinach.
  • After spinach has wilted, turn off the heat and pour in egg mixture.
  • Gently stir eggs with spinach and mushrooms.
  • Top with shredded cheddar cheese and bake for 20 minutes.
  • The frittata will be very puffy when removed from the oven and will slowly deflate.
  • Optionally, top with more thyme and allow to rest 10 minutes before serving.

Need to supplement your breakfast? Have some Banana Bread or Blackberry Rhubarb Muffins.

Roasted Pepper & Caramelized Onion Pasta

Sometimes I feel guilty about eating pasta if I’m not having any vegetables, but it makes it better when you can hide some veggies into the sauce! Summer veggie season is coming to a close so I’m visiting as many farmer’s markets as I can before they close. Roasted peppers and caramelized onions give the sauce some natural sweetness and the heavy cream makes it super unctuous and rich. This sauce is definitely addicting and so easy to make with little hands-on time required.

Ingredients

Bell peppers – I recommend using red or orange for the colors and extra sweetness. Green will be less sweet but still super tasty.

Onions – Use any you like! Once they are roasted, any onion will have a more mellow, sweet flavor. I used what I had on hand – one red and one sweet!

Heavy cream – Feel free to substitute with a non-dairy alternative.

Roasted Pepper & Caramelized Onion Pasta

Print Recipe
Roasted peppers & caramelized onions make a creamy pasta sauce with a sweetness from red peppers and mellowed onions.
Course Main Course
Keyword caramelized onions, pasta, roasted peppers

Equipment

  • 1 blender

Ingredients

  • 3 bell peppers
  • 2 onions
  • 1 bulb garlic
  • olive oil
  • 1 cup heavy cream
  • 1/4 cup Pecorino Romano grated
  • salt
  • pepper
  • 1 pound pasta

Instructions

  • Peel onions and cut in half. Then slice each half into large half moons about 1 inch thick. Transfer to baking sheet.
  • Peel 1 bulb of garlic and transfer to baking sheet.
  • Remove seeds, stems, and ribs from bell peppers and chop into ~2×2 inch pieces. Transfer to baking sheet.
  • Generously drizzle vegetables with olive oil and season with plenty of salt and pepper.
  • Toss vegetables to distribute oil & seasonings.
  • Ensure vegetables are in one even layer on the baking sheet and then bake with convection on, if possible, at 400F for 30 minutes.
  • Part way through baking, stir vegetables on sheet tray to ensure even cooking. Ensure vegetables are in a single layer again before returning to oven.
  • After peppers and onions have roasted with some color and onions are frizzled and caramelized, allow to cool for 10 minutes.
  • Blend onions, garlic, and peppers with 1 cup of heavy cream and Pecorino Romano.
  • Cook 1 pound of pasta in heavily salted water a few minutes under suggested cook time on packaging.
  • Reserve 2 cups of pasta water minimum.
  • In a separate pan, add pasta sauce and par cooked pasta. Add pasta water 1/2 cup at a time until all pasta is evenly coated in the sauce.
  • Season with additional salt and pepper to taste.
  • Serve with fresh basil and toasted pine nuts.

More pasta? Make your own Fresh Egg Pasta and have it as Anchovy Oil Pasta with Crispy Prosciutto

Anchovy Oil Pasta with Crispy Prosciutto

After a tin or jar of anchovies is used up for a pizza or in a Caesar salad dressing, what do you do with the anchovy oil? It’s umami and funky, so definitely don’t let it go down the drain. If you’ve never tried anchovies, you definitely should. Anchovies are hidden in a lot of foods you probably already eat, so really it’s not anything new. Anchovies and the anchovy oil make a flavorful sauce and some crispy prosciutto add extra texture. A sprinkle of red pepper flakes on top would make this even better.

Ingredients

Anchovies – You have to! No debate.

Pasta – I like a long noodle, in this case it was fettucine, but please use any noodle you see best fit.

Prosciutto – Prosciutto adds some extra salt and texture to the dish. You could also use some crumbled bacon or pancetta.

Anchovy Oil Pasta with Crispy Prosciutto

Print Recipe
A rich, umami pasta using leftover anchovies and with crispy prosciutto
Keyword anchovies, pasta, prosciutto

Ingredients

  • 1/2 lb pasta fettucine
  • 4 slices prosciutto
  • 2 anchovy filets
  • 1 tbsp anchovy oil
  • 2 tbsp olive oil
  • 1/2 cup pecorino romano grated
  • 1/4 cup toasted pine nuts
  • fresh basil garnish

Instructions

  • In a cold pan, add prosciutto and turn to medium heat to slowly cook and crisp.
  • While prosciutto is crisping, start boiling water.
  • Continuously flip prosciutto as necessary.
  • Cook pasta in salted, boiling water a few minutes less than package instructions to al dente.
  • When prosciutto is crispy, set aside onto a paper towel lined plate.
  • Lower heat on prosciutto pan and add anchovies, anchovy oil, and olive oil. The heat will basically dissolve the anchovies into the oil.
  • Ensure heat on the anchovy pan has lowered to prevent any oil splashing and add pasta to the pan.
  • Add additional 1/2 cup of pasta water to the pan.
  • Mix in pecorino romano and increase heat to medium. Continue mixing until cheese is fully incorporated into pasta.
  • Serve pasta with fresh basil, toasted pine nuts, and bits of crispy prosciutto on top!

Make your own pasta? Try Fresh Egg Pasta with Basil Pesto

Chocolate Torte

You get a last minute invitation to dinner and you have less than 2 hours before you need to leave, what do you make? If you have anymore than an hour’s notice, you can make this torte! No need for softened butter since melted butter and melted chocolate make for a quick batter and everything can easily be mixed by hand. Just don’t forget to preheat the oven! This torte served warm gives brownie/lava cake energy while a cold version is rich and dense.

Ingredients:

Chocolate – Use chocolate chips or chocolate bars. I wouldn’t use anything sweeter than semi-sweet. You want this to be dark and rich!

Butter – Yes, this cake is basically just chocolate and butter but that’s why it tastes good.

Sugar – The bitterness from the chocolate really offsets the sweetness.

Chocolate Torte

Print Recipe
A quickie dessert that can be made gluten-free and eaten hot or cold.
Course Dessert
Keyword cake, chocolate, gluten free, torte
Cook Time 20 minutes

Equipment

  • 1 9 in springform pan

Ingredients

  • 1 cup butter
  • 1 cup semisweet chocolate chips
  • 1 cup sugar
  • 1/4 cup almond flour or AP flour
  • 1/4 tsp salt
  • 5 eggs
  • powdered sugar for dusting

Instructions

  • In the microwave or over a double-boiler, melt butter and chocolate and mix together. If using a microwave, microwave in 15 second increments and stir in between to ensure nothing burns. Once completely mixed, set aside to cool.
  • In a separate bowl, mix together almond flour, sugar, eggs, and salt.
  • While waiting for chocolate and butter to cool, line your springform pan with parchment paper to ensure that none of the batter leaks out of the pan.
  • Mix the chocolate/butter mixture into the almond/sugar mixture.
  • Pour into parchment lined pan and bake at 400F on a middle rack for 20-25 minutes until toothpick comes out clean.
  • Optional – dust the top of the torte with powdered sugar before serving. for even more richness, serve alongside a scoop of vanilla ice cream with chocolate syrup drizzled on top.

Try another baked good like Bread Pudding or Chocolate Chip Walnut Cookies

Soy Stir Fry Bean Thread Noodles

Noodles > rice, always, but what noodles to pick?? In the summer time, I always want a noodle, but don’t want to have to boil an entire pot of water. One versatile noodle, perfect in a soup or stir fried, is the bean thread noodle. These skinny noodles can be made from mung bean starch or sweet potato starch, and really soak up whatever liquid they’re cooked in. They’re popular in hot pot since they soak up that tasty broth without making the liquid cloudy. They’re also perfect for a summer noodle stir fry since the noodles don’t need to be pre-boiled. These noodles also don’t tend to clump much, so they can be eaten hot or at room temperature.

Ingredients

Mung bean noodles – The skinny kind! You could also make this recipe using a Korean style glass noodle, but those noodles will need to be boiled and cooked in advance.

Vegetables – Use what your heart desires! I had some greens, onions, and mushrooms on hand, but this would also be delicious with broccoli, kailan, celery and carrots. Remember to only partially cook your vegetables before adding the noodles so that they don’t overcook.

Soy Stir Fry Bean Thread Noodles

Print Recipe
A no-boil required recipe using those skinny bean thread noodles.
Course Main Course
Cuisine Asian
Keyword bean thread noodles, noodles, stir fry

Equipment

  • large pan with lid

Ingredients

  • 1 sweet onion sliced
  • 2 cups diced mushrooms
  • 2 cups greens spinach, chard, kale
  • 2 tbsp sugar
  • 2 tbsp soy sauce
  • 2 tbsp water
  • 2 tbsp sesame oil
  • 2 tbsp chicken bouillon powder
  • 8 ounces bean thread noodles dried
  • 1/2 cup green onions sliced

Instructions

  • Up to 4 hours in advance of cooking, soak bean thread noodles in warm water, ensuring all noodles are submerged.
  • In a pan on medium heat, add sliced onions to start.
  • While onions are getting started, mix together the sauce by adding sugar, soy sauce, water, chicken bouillon, and sesame oil.
  • Add diced mushrooms to pan and stir, cooking until onions and mushrooms start wilting.
  • Add in your greens on top without stirring.
  • Drain noodles and add on top of the other vegetables.
  • Pour sauce over noodles and put lid on the pan.
  • Allow noodles and vegetables to steam for another 5-10 minutes. Remove lid halfway to gently toss, and continue cooking covered until noodles are completely done.
  • Gently toss green onions throughout noodles and serve hot or at room temperature!

Have some other noodles like 10-Minute Soy Ginger Noodles or make some Soy Marinated Soft Eggs to put on top of these ones!

Strawberry Rhubarb Basque Cheesecake

The sourdough has been tucked away for the summer but that doesn’t mean that there isn’t any baking happening. I love a cheesecake for a summer dessert, especially a minimal fuss basque-style cheesecake. The oven can go on in advance of an event, the basque cheesecake can sit in the fridge for a couple days, and it can be taken out to get to room temperature before serving (and to make fridge space if hosting). Basque cheesecakes are lighter and fluffier than their New York style sister, don’t have any graham cracker crusting, and end up with a caramelized exterior.

Ingredients:

Strawberry Rhubarb Jam – from Strawberry Rhubarb Jam, feel free to substitute with other jams you may have

Eggs – These give the cheesecake the fluffy texture and rise in the oven.

Strawberry Rhubarb Basque Cheesecake

Print Recipe
A summery cheesecake that mixes together easily in one bowl.
Course Dessert
Keyword cheesecake, rhubarb, strawberry
Cook Time 1 hour

Equipment

  • 1 12" springform pan
  • parchment paper

Ingredients

  • 1.5 lbs cream cheese room temp
  • 1 cup sugar
  • 1 cup strawberry rhubarb jam
  • 2 cups heavy cream
  • 6 eggs
  • 1 tsp salt
  • 1/3 cup all-purpose flour

Instructions

  • Add cream cheese and sugar to a stand mixer and beat with the whisk or paddle attachment until smooth. Stop and wipe down the bowl and beaters as necessary.
  • While this is mixing together, line the springform pan with parchment paper to cover the entirety of the bottom and the sides. Some may protrude over the top of the pan, but that's ok! If you don't like the look, trim the top. The folds in the parchment will give the cheesecake extra texture on its caramelized sides.
  • Add jam to mixer and continue mixing. Stop and wipe down the bowl and beaters as necessary.
  • While mixer is still on, add eggs one at a time. Wait until each egg is fully incorporated before adding the next. Stop and wipe down the bowl and beaters as necessary.
  • Mix salt into heavy cream and pour into the mixer. Stop and wipe down the bowl and beaters as necessary.
  • Add flour and only mix about 10 seconds.
  • Turn off mixing, and gently mix about 5-10 additional stirs until flour is completely mixed.
  • Pour batter into parchment lined springform pan, tent with foil, and bake at 400F for ~40 minutes. Bake uncovered additional ~20 minutes until browned on top.
  • Remove from oven after 60 minutes. Cheesecake will have risen and look very jiggly. It will set as it cools, deflating in the center.
  • Allow to come to room temp before removing from springform pan and serving.

Try another cheesecake: Pumpkin Basque Burnt Cheesecake or another jam: Blueberry Rhubarb Jam

Shreddy Pork Tacos

When making a meal for a crowd, I think tacos are one of the best meals that you can make in a short amount of time. Pick a protein, make a slaw type of topping, throw it in a tortilla and you’ve got a meal for self-assembly. These are in no way authentic, but they are easy and tasty!

I prefer using pork shoulder to get a flavorful filling that shreds easily after an hour or so in a pressure cooker/Instant Pot. It’s even faster when you use a jar of salsa as part of your seasoning. Slaw can be made ahead or while your protein is cooking. Quickly shred some cabbage, onion, carrot, or any other veggie and mix with some acid to get your crunchy topping.

Ingredients:

Protein – I prefer bone-in pork shoulder but you could use boneless, chicken thighs, or beef chuck to get a similar shred.

Salsa – use what you like or have on hand

Slaw – to be even speedier, use a bag of premade coleslaw mix

Tortillas – I’m a corn gal, but flour, cassava, or lettuce leaf are other great alternative methods of transport to get the fillings to your mouth!

Shreddy Pork Tacos

Print Recipe
Course Main Course
Keyword pork, tacos
Cook Time 1 hour 30 minutes

Equipment

  • 1 pressure cooker/instant pot

Ingredients

Pork

  • 5 pounds pork shoulder
  • olive oil
  • 5 tsp salt
  • 16 oz salsa
  • 1/2 onion

Slaw

  • 1/2 cabbage shredded
  • 1/2 red onion shredded
  • 1/2 cup mayo
  • 1/2 tsp salt
  • 1 tsp sugar
  • juice of 1 lime

Instructions

  • Turn instant pot to high or heat pressure cooker. Add oil.
  • Sprinkle pork shoulder with salt and sear on all sides.
  • After all sides have been seared, add in salsa and additional water until pork shoulder is covered in liquid.
  • Chop up half an onion and add to the pot to braise.
  • Cook on high for 2 hours.
  • While pork is cooking, shred and and mix cabbage and onions.
  • Add mayo, lime juice, salt, and sugar to the slaw, and store in the refrigerator until ready to eat.
  • When pork is ready, remove from pot and shred, or leave whole for self-service shredding.
  • Warm your tortillas and assemble your tacos!

Need something sweet? Have Chocolate Chip Walnut Cookies or Pumpkin Walnut Cake with Chocolate Hazelnut Spread